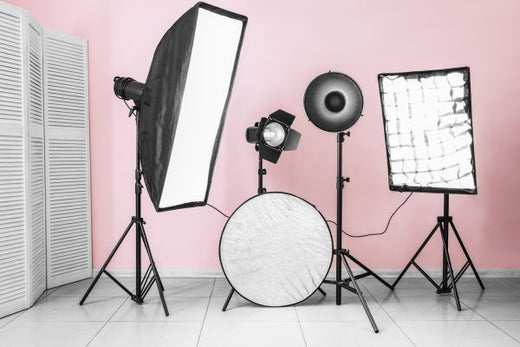
Photography is a captivating art form with the power to capture moments and tell stories through images. If you’re just starting out and want to explore the craft of creating stunning photos in a controlled environment, setting up a home photo studio is an excellent step forward. This comprehensive guide will walk you through the process of creating your own studio, with essential equipment advice and beginner-friendly tips.
Benefits of a Home Studio
Having a photo studio at home offers numerous advantages:
- Creative Freedom: You have complete control over lighting, backgrounds, and composition.
- Cost Savings: Avoid expensive studio rentals and save money in the long run.
- Convenience: Shoot anytime without worrying about studio hours.
- Learn and Experiment: A home studio is a perfect environment to practice and explore various photography techniques.
Let’s get started on setting up your studio!
Step 1: Space and Location
Choose the right space for your studio. It could be an extra room, a garage, or a well-lit corner of your home. Make sure the area has:
- Ample Natural Light: Preferably with large windows for soft daylight.
- Access to Power Outlets: Essential for artificial lighting and equipment.
- Enough Room: To move around and set up backgrounds, lights, and equipment.
Step 2: Lighting
Lighting is the cornerstone of great photography. Here are some options:
- Natural Light: Use daylight from windows for soft, diffused light—ideal for portraits.
- Continuous Light: Constant light sources give you a live preview of how your photo will look.
- Flash Lighting: Flashes provide short, powerful bursts of light, perfect for freezing motion.
Experiment with lighting setups like three-point lighting (key, fill, and backlight) to create professional-looking images.
Step 3: Backgrounds and Accessories
Invest in versatile backgrounds to suit different photography styles:
- Solid Colors: White, black, and gray are classic and adaptable.
- Textured or Patterned Backdrops: Add personality to your shots.
Accessories to consider:
- Stands and Reflectors: To bounce or diffuse light.
- Tripods: For camera stability.
- Diffusers and Softboxes: To soften harsh lighting.
Step 4: Camera and Lenses
A DSLR or a high-quality smartphone with a good camera can suffice for beginners.
- Lens Recommendation: A 50mm prime lens is a great starting point for its versatility and sharpness.
- Smartphone Tip: Use apps that offer manual settings for greater control over focus and exposure.
Step 5: Shooting and Editing
Now that your studio is ready, it’s time to shoot!
- Create a comfortable environment for your subjects.
- Be patient and experiment with angles, lighting, and compositions.
- Take multiple shots to ensure you capture the perfect one.
After shooting, use editing software like Adobe Lightroom or Photoshop to enhance your photos:
- Adjust brightness, contrast, and colors.
- Remove blemishes or distractions.
- Add finishing touches to make your images pop.
Step 6: Learn and Grow
Photography is a lifelong learning journey.
- Experiment: Try different techniques, lighting setups, and compositions.
- Educate Yourself: Take online courses or read about photography principles.
- Get Inspired: Study the work of other photographers to spark creativity.
From Beginner to Professional
Setting up your home photo studio is an exciting step in your photography journey. With the right equipment, thoughtful lighting, and a touch of creativity, you can create stunning images to share with the world.
Keep experimenting, continue learning, and most importantly, enjoy the art of capturing moments through photography. Happy shooting!


Share:
Pantyhose: A Guide to Style, Comfort, and Warmth
Mental Health and Fitness: The Mind-Body Connection